
An original Procreate topographic illustration, separated into individual SVG contour layers, cut on a Cricut Explore Air, and hand-assembled with foam spacers into a dimensional layered shadowbox. A full digital-to-physical workflow, start to finish.
Most illustration work ends at export. This piece was an experiment in pushing a single design all the way through to a physical object: start with an original topographic map drawn in Procreate, then translate it into a layered paper sculpture you can hold, frame, and hang. The challenge wasn’t the drawing — it was everything that happens after, where a screen design has to survive contact with a blade, cardstock, and glue.
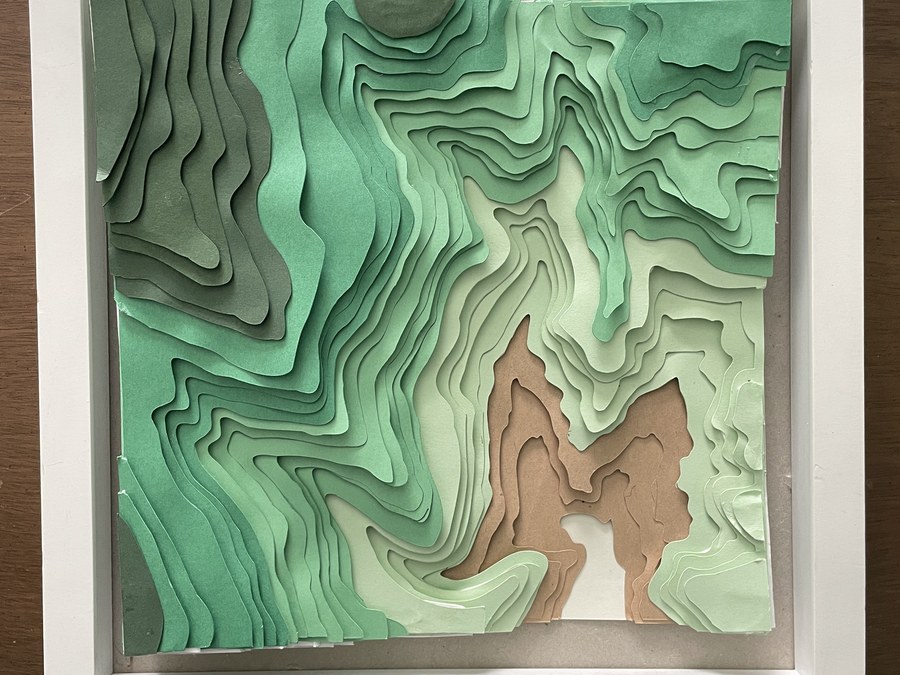
The result is a framed shadowbox where each elevation band is a separate cut layer of cardstock, stacked with foam spacers so the terrain physically steps up out of the frame and casts its own shadow. The map reads as a map flat, and as a landscape in relief.
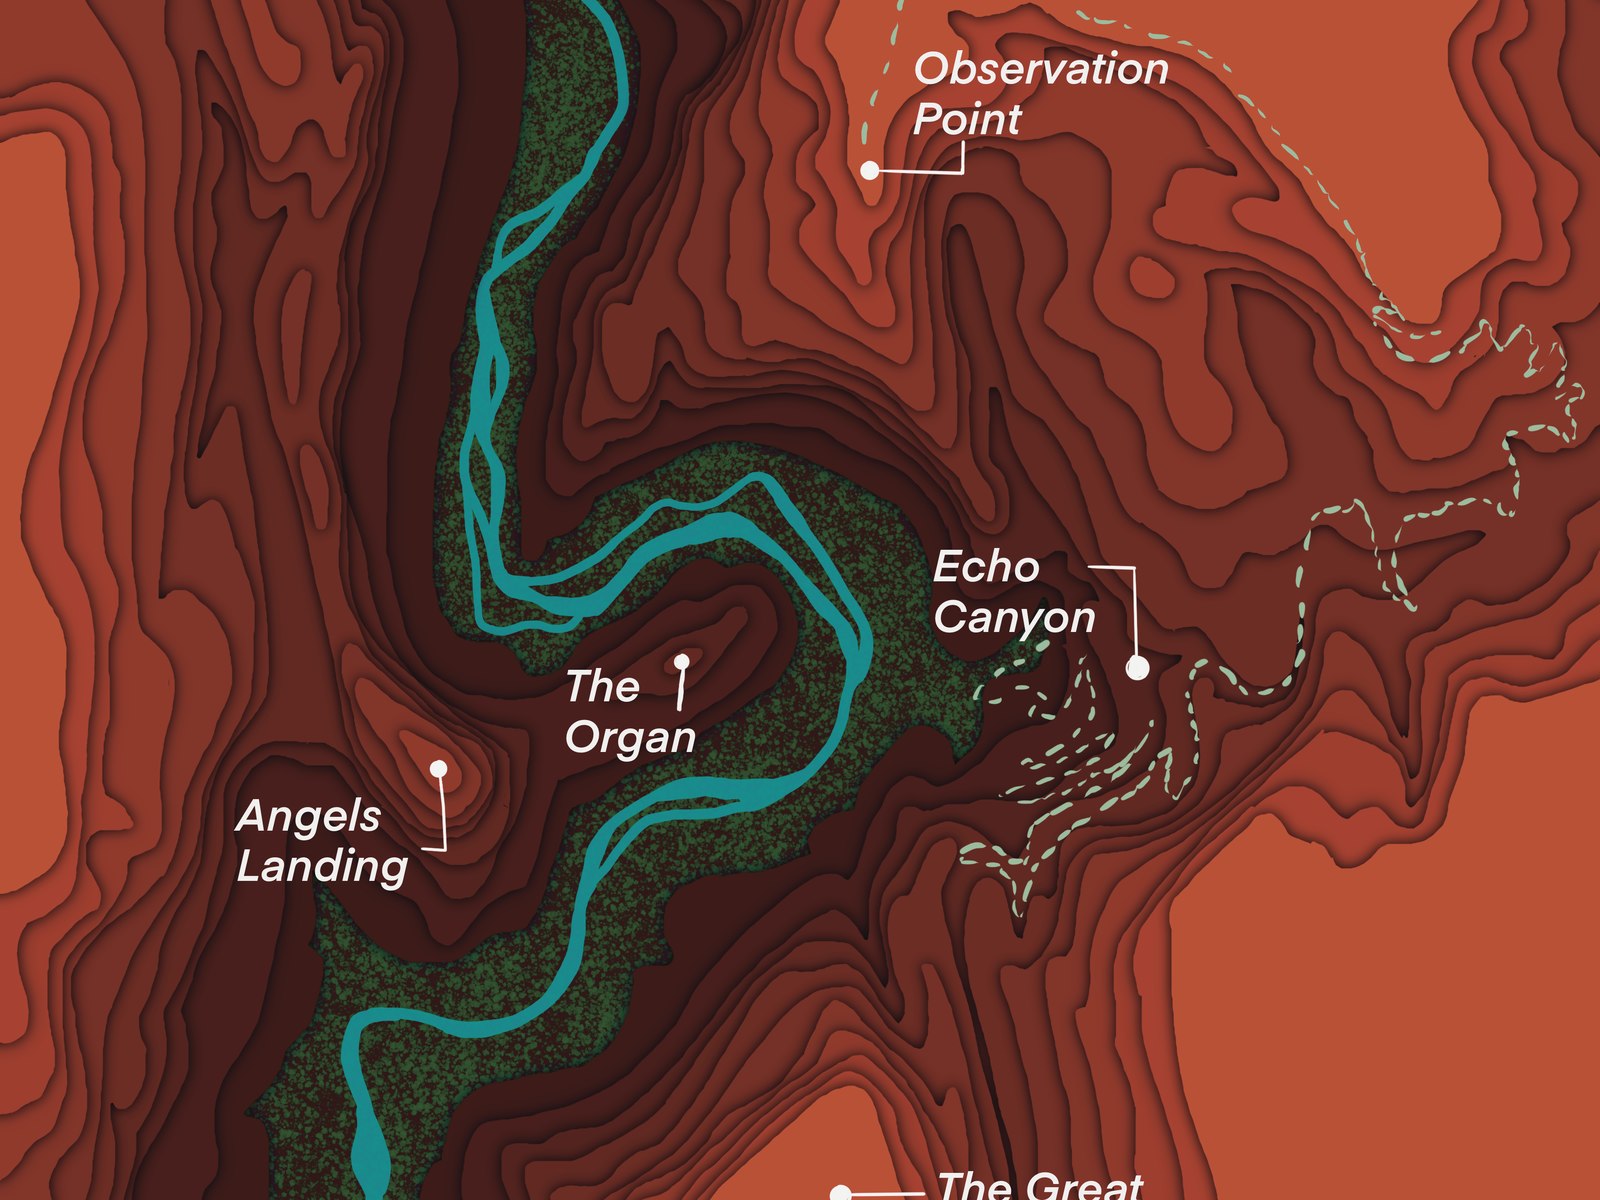
The piece begins the same way the rest of the Terrain Tales work does: as an original illustration in Procreate. I research the topography of a meaningful hike or outdoor location, hand-draw the contour lines, and place curated trail markers for the landmarks that matter — points like Observation Point, Angels Landing, and Echo Canyon at Zion. At this stage it’s a flat illustration that already works as wall art on its own.
But it’s drawn with a second life in mind. Every contour band is kept as a clean, closed shape on its own layer, because those same elevation bands have to become individual cut files later. The drawing decisions are made with the blade already in view.

The work that makes this piece is the translation between mediums. A digital illustration assumes infinite resolution and zero physical constraint; a paper sculpture assumes neither. Each step below is a place where a screen decision had to be re-made for the real world.
Research the topography, hand-draw the contour lines, and label the trail markers. The whole map is built so that each elevation band is a discrete, closed shape — the design is illustration and blueprint at the same time.
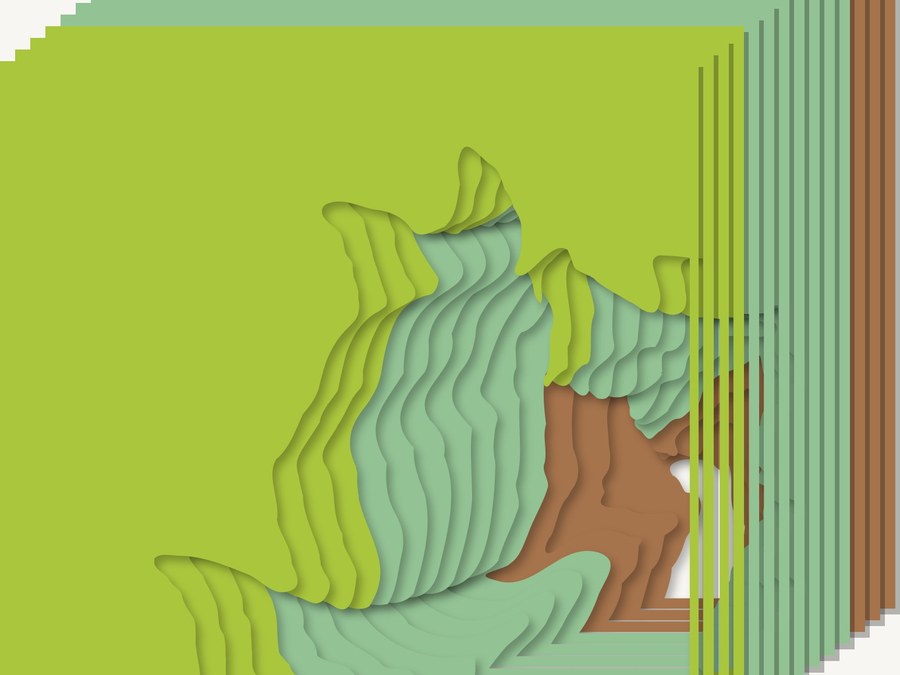
Each contour band is pulled out as its own vector layer and exported as a clean SVG cut file. This is the make-or-break step: paths have to be closed and nested correctly so the Cricut reads one cut per layer, and so the stacked layers register on top of one another when assembled.
Each SVG is brought into Design Space, sized to the frame, and assigned to a cardstock color that maps to its elevation. Material settings, blade pressure, and mat type get dialed in — the kind of production tuning that decides whether thin contour necks tear or hold.
Layer by layer, each elevation band is cut from cardstock on a Cricut Explore Air. Delicate cuts get weeded by hand. What was a single flattened image on screen becomes a physical stack of individual paper terraces.
The layers are stacked lowest-elevation-first and separated with foam spacers, so the terrain physically steps upward and throws real shadow between bands. Alignment is done by eye and registration — small offsets read instantly in relief, so this is patient, hands-on work.
The assembled stack is mounted and framed as a shadowbox — deep enough to hold the layered build — turning a digital map into a tactile object that lives on a shelf or wall.
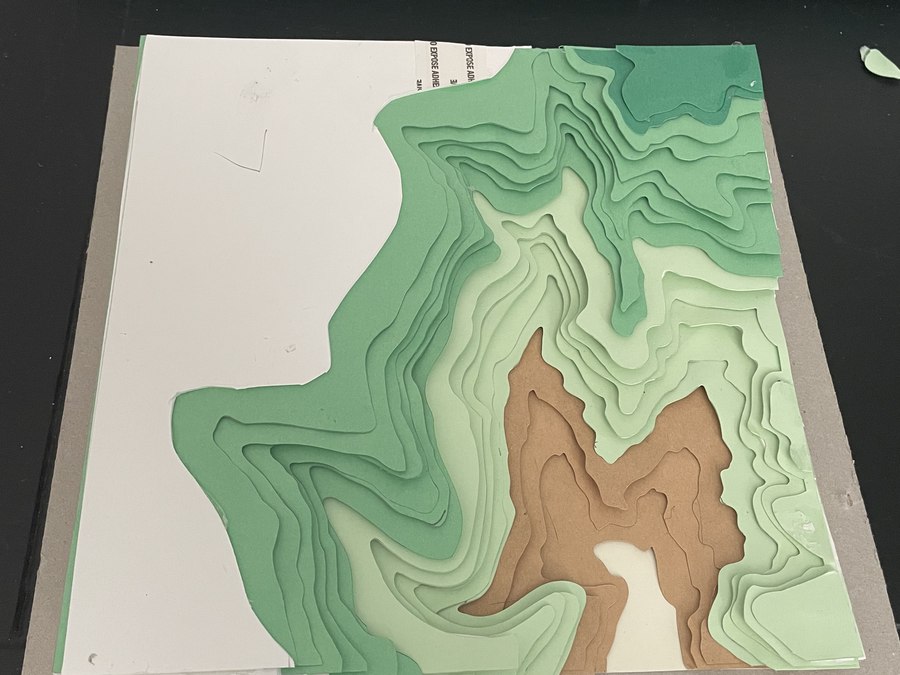
The full chain — a flat Procreate map becomes a set of registered SVG layers, gets cut on the Cricut Explore Air, and assembles into a dimensional relief. The in-progress shot is the proof: this is a made object, not a render.
Framed and lit, the layers read as real terrain. Each elevation band casts a soft shadow onto the one below it, so the map has genuine depth — the valley floor drops away in tan, the ridgelines rise in deepening greens. Photographed at an angle, the stack is unmistakable: this is a physical object, not a flat print.
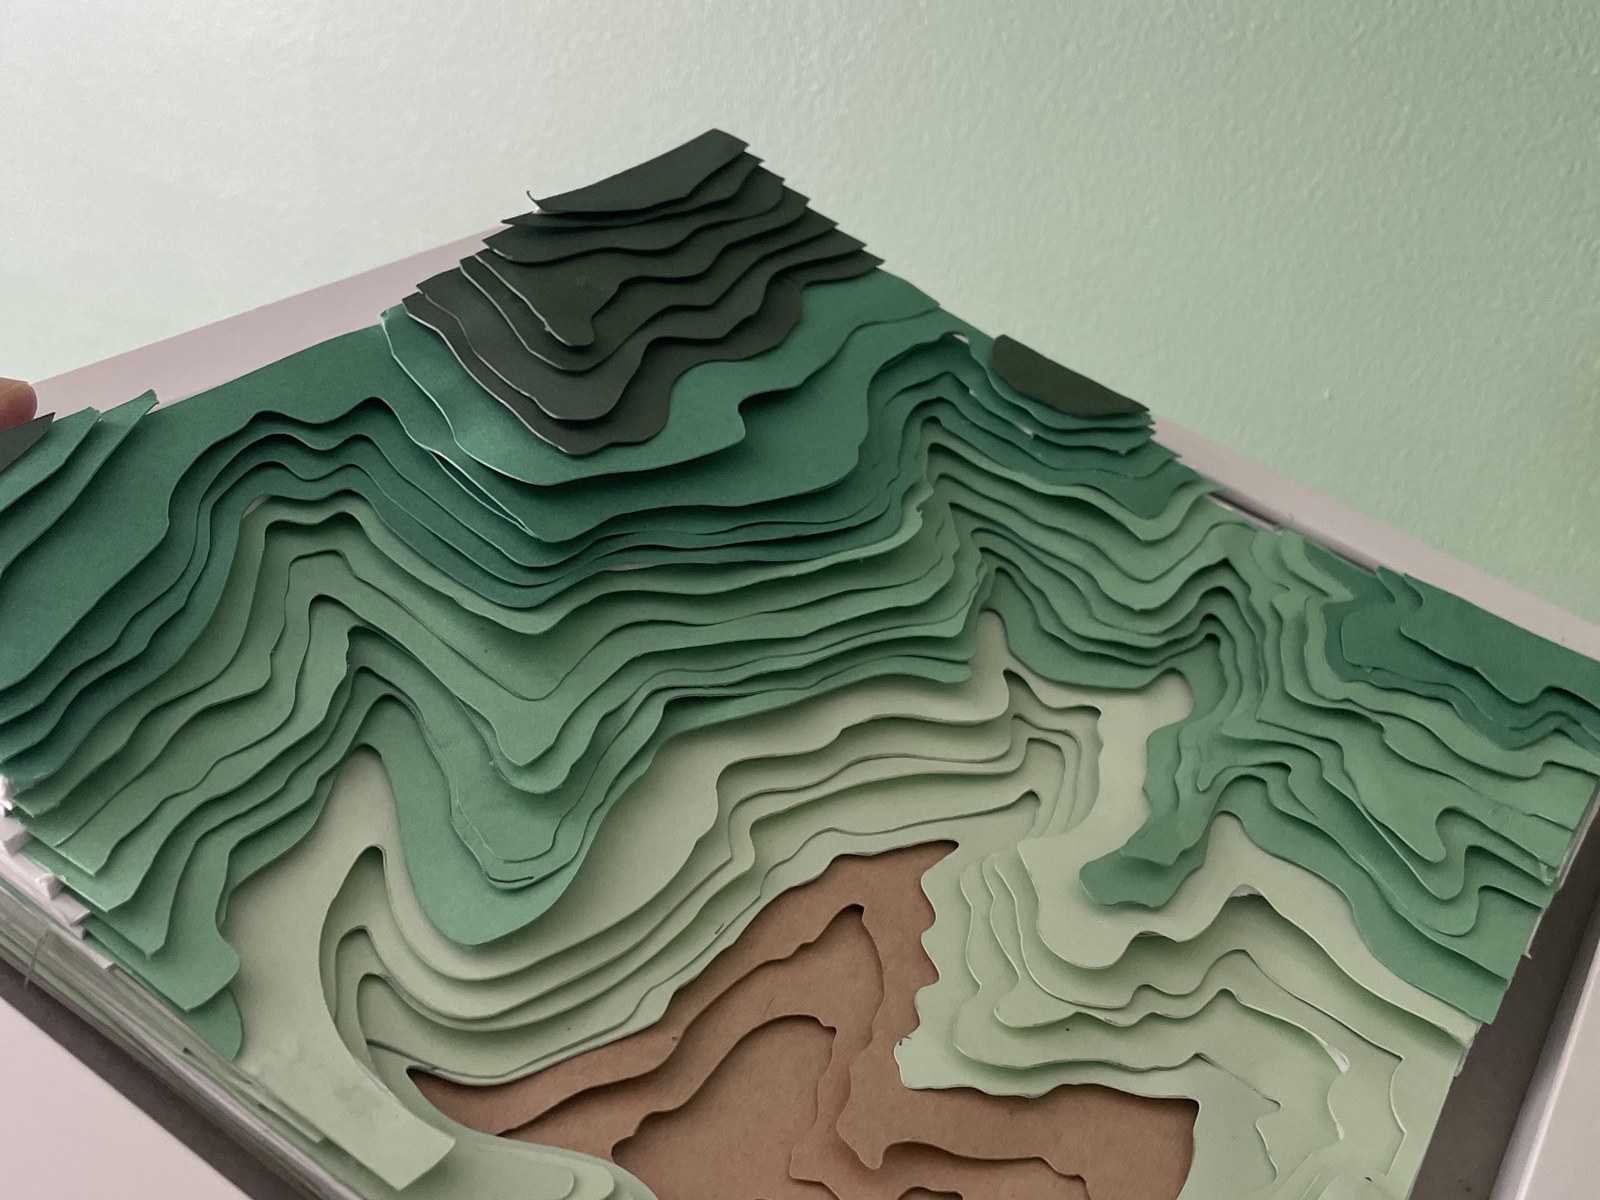
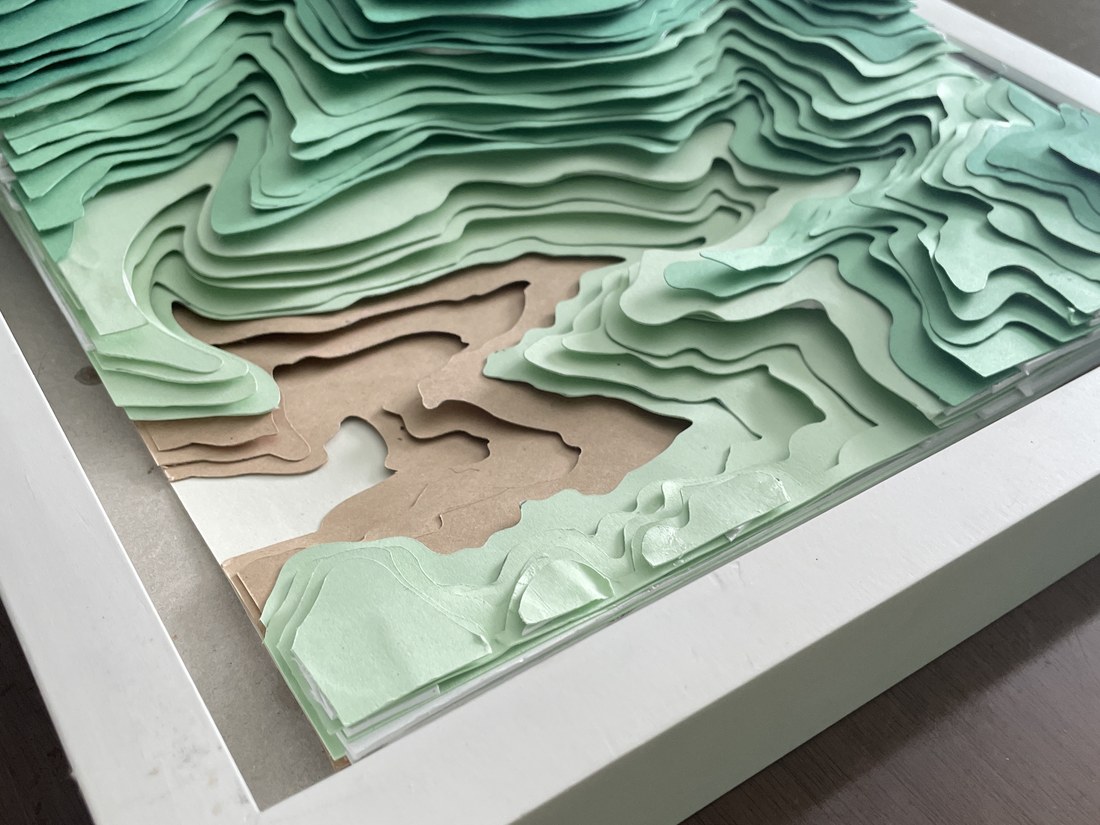
Angled views of the finished, framed shadowbox — the layered contours step up out of the frame and cast their own shadow.
Anyone can export a JPEG. The value in this project is everything between the illustration and the object: structuring artwork so it survives separation into clean cut files, prepping production-ready SVGs that register when stacked, dialing in material and blade settings so fine contours hold, and assembling with the patience a relief build demands. It’s the same instinct that makes a print file behave on press — applied to a craft knife instead of a plate.
It also makes the work repeatable. Because the layers live as a clean SVG kit, any map in the Terrain Tales series can run through the same pipeline — flat print, poster, or dimensional shadowbox — from one source illustration. That’s what turns a one-off craft into a product line.
The finished shadowbox sits on my shelf — but the more useful output is the workflow behind it. This piece proves I can take a design from concept through illustration, vector layer separation, physical production, and hand assembly without losing fidelity at any handoff. It’s a personal project, made for the craft of it, and it doubles as a working blueprint for the dimensional side of the CreativePalmer catalog.
“A flat map tells you where things are. A layered one lets you feel the climb.”